Thursday, February 26, 2009

Comic Relief for One


This is just proof of how far the Organized Wedding Mafia will go to make sure that every single item you buy for your wedding is certifiably wedding related and approved.

The Problem:
Just when you thought you had it all figured out--the invites, save the dates, centerpieces, dress, caterer, photographer, wedding favors, table runners, ceremony vows--all of it...you are left with one glaring, undeniable problem. THE GARBAGE! What about the garbage?!

The Dilemma:
This is a WEDDING, people! There is no way that I can have those ugly black Glad trash bags to collect the trash on my perfect day. Oh no, no way. Not this bride. Nu-uh.

The Solution:
Wedding trash bags! Yes! Of course!

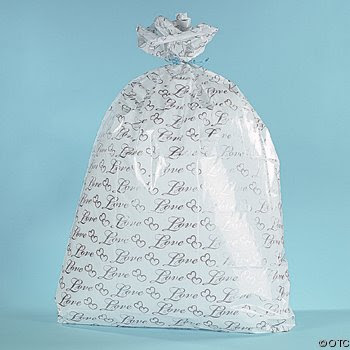
Yes! So that even your trash is pretty (sigh of relief). A mere .99 cents here, just in case you do not share my cynicism and actually want one of these things. 
No judgement!


P.S. Check out the "ratings" for this product found by clicking the link above. You gotta love it. One was serious. One person uses these for wrapping paper (not a bad idea), and the third? Let's just say she/he is as cynical as I am, or more. (:

Monday, February 23, 2009

Paper Preoccupation


Photo credit: Yaronius Maximus*

Never a moment to rest.

As soon as I settled on a stamp (ok, I ordered a few--just in case--but I will use those even if not for the wedding) I had to tackle the next issue: paper. What good is a stamp without something on which to stamp it? Enter paper.

So I searched and searched and searched. In fact, I am still searching. So far, I have found one paper resource that I will likely use. It is reasonably cheap, has gotten good reviews, has been mentioned on other sites as reliable, and provides you with a Paper 101 lesson right on the website. It also describes all the envelope sizes and what size insert you should have with each envelope. Very straightforward and easy to understand.  Now I finally know about the weight of the paper I want to use for my invitations (I'm going for somewhere between 80lb-100lb cover paper). 

We are thinking about using the brown kraft paper for the invitation envelope and response card envelope, and traditional white paper (with a stamp!) for the invites and response card:
The organic, environmentally supportive (100% recycled, 20% post consumer) kraft material fits the down-to-earth, outdoor setting of our public park venue, too. The nice thing about the kraft paper is that you can easily and cheaply embellish it with brown bags you have at home. It also goes with whatever ink color you choose, including black (=cheapest!). We might cut shapes, letters, borders, etc., out of the brown bags with punches and affix them on the invites for continuity between the invites and envelopes. They also sell kraft paper to match the envelopes but that was too much brown for me, but if brown is your color...that is one sweet deal.

I'm also toying with the notion of using clear envelopes, though Jake is not too keen on that idea.
True, we would need an extra sheet of paper in there to "cover" up the information inside the envelope, but if we used a pretty patterned or design paper, it would have a really cool effect, and we could use that sheet to address the envelope. Given that Jake is often the practical half of this partnership when it comes to craft logistics, though, he does have a point. I'll have to think about it more.

If you don't have a paper cutter, don't have the time to chop a bunch of paper up, or if the stress of cutting straight edges gives you heart palpitations, these flat cards may be just the thing for you! They come with matching envelopes, of course, and this "curious iridescent" series looks super nice; simple but elegant with a touch of flare. Yet another option. Did I mention all of these are oh-so reasonably priced? A pack of 50 pre-cut large (A-9 size), 89lb cover (nice, heavy cardstock) flat cards in various "curious iridescent" delicate colors costs only $12.75. Matching style & sized envelopes in 50 packs are $25.12. Given that I will likely not need more than 50 for our 100 person guest list, this is good news!

If you are using red envelopes for any part of your invites you are in serious luck, as they are on clearance right now at paper-papers.  You could mix and match red envelopes with a different color paper for the invites or save the dates, and use red ink for the stamp as a coordinated set. Or...you could forget about buying for the wedding and just buy the envelopes for other craft projects because they are so cheap, high quality and the coolest shade of red ever...


It is such a great feeling to finally encounter one part of the wedding planning and realize it is completely do-able, both in terms of our budget and being able to control the creative/design process. Makes me feel like I can actually manage to get it done with little added gray hair--yay!


* P.S. These texture boxes [in header] are all downloadable by the photographer. He photographed various textures and scanned them. If you download them, you can use any of them as backgrounds for your wedding or other projects, with his permission! This is an awesome and creative option for those of you who want the look of special paper but can't afford to buy them. You can use one of his many samples (look elsewhere on his flickr site for more) or scan your own. Triple thanks to this artist for sharing!! (:

Saturday, February 21, 2009

Stamp Right Up!


Just as a follow up to my last blog post, here are some updates:

1) I have gotten more sleep.

2) The hunt for the perfect stamp continues.

3) I thought I would share with you my top stamp choices thus far; the candidates for the Jake and Maggie stamp extravaganza. And others that are just plain cute. 

YYYYYYYYYYYYYYYYYYYYYYYYYYYY


Available here.

Right now the stamp in the header (and smaller, above) is my first pick (top left corner stamp). I would stamp the birds centered on the top of the invite, and use the branches here and there (sans birds) on other parts of the invitation, thereby continuing the general nature theme. I'm imagining something like this in terms of placing branches on the perimeter of the cards.

YYYYYYYYYYYYYYYYYYYYYYYYYYYY


Available here.

I Iove this one, but since we are not going to have cocktails at the wedding (it's in a public park so beer and wine only), it is not a great fit. Otherwise, this just might have been it! The word comes literally on the side of the stamp itself so you can choose to use it or not, and place it wherever you want which cleverly increases the possibilities.


YYYYYYYYYYYYYYYYYYYYYYYYYYYY

Available here. 


This one sheet provides many possibilities. These are clear stamps which means they peel off the page and you place them however you want on the clear block before pressing the block onto the ink pad. The heart tree or the heart stump could stand alone, as could the squirrel. I like the idea of putting the two owls next to each other and then stamping the three hearts stamp between them (you can do this easily by placing the owls and hearts in whichever position you want them on the stamping block and then inking the whole thing). If you like this series, there are just so many possible combinations. Use the bird with hearts next to her for the top of the invitation, and the birdhouse on the RSVP cards. Or stamp the tree in the center and the heart branches on the other parts of the invite. Or use the squirrel/stump/branch combo. See what I mean? So many choices with this one. 

YYYYYYYYYYYYYYYYYYYYYYYYYYYY

These next few are simple and classy. You could color in some of the petals, flowers, etc. to add spark. You could make two flowers the same colors, to represent you and your future husband/wife, for example.

Available here. 


Dot trees available here.

Peony available here.


Bird available here.

Love stamp available here.

Heart bird available here.

YYYYYYYYYYYYYYYYYYYYYYYYYYYY

Love circle available here.

If you are going for simple, this one may be just right. My idea was to stamp one circle over the other to create concentric circles which would nicely represent two lives intersecting. I like the idea of concentric circles because rather than symbolizing a couple's complete melding together (unrealistic), the overlapping parts represents the unity of two while the sides represent the independence of each part which makes up the whole. Again, with two stamps overlapping, you could use two colors--perhaps even your wedding colors if you have chosen to have theme colors. 

YYYYYYYYYYYYYYYYYYYYYYYYYYYY


This set is available here.

This is another stamp we are considering (the birds with the heart between them). I really like the concept but the actual image is a bit too plain for my taste. If I use it, I would probably add a background/texture stamp in a different color behind the birds. Or add a branch from another stamp under the birds and then continue that theme throughout the invites/cards.

YYYYYYYYYYYYYYYYYYYYYYYYYYYY


Gumball machine can be purchased here.

This one I absolutely love! I think it is a perfect combination of playfulness and simplicity. It just brings a smile to your face doesn't it? If you are giving away nice gumball wedding favors or gumballs somehow are relevant to your life, these would be perfect. It's almost enough to make me want to make gumballs something I would give away at the wedding just to continue the theme.  

YYYYYYYYYYYYYYYYYYYYYYYYYYYY

For anyone who is celebrating their second (or more) marriage, and/or may have a child already, or any other threesome type situation, either of these stamps would be a nice choice:

3 birds available here.

OR if you can manage it, you could always only ink two of the three birds to represent a twosome (something I am considering).

The owls are available here and would be perfect for a fall/winter wedding!

YYYYYYYYYYYYYYYYYYYYYYYYYYYY

Ah, decisions, decisions...

For those of you who cannot envision yourselves stamping away at one invite after another, you could always stamp the image on a white sheet of paper and scan it into your computer. That way you can just print the image along with your text. It will have a different texture/feel to it than if you actually hand-stamped each card, but it still would provide a cheap and unique DIY alternative. The nice thing about stamps is--you never know what other wedding items you will want to stamp as you go through the process. You can't easily put fabric through your printer, but you can stamp the fabric with permanent ink for decoration. Pretty cool stuff. 

Happy stamping!

Thursday, February 19, 2009

Stamping the Night Away


Photo Credit: Jeffrey Beall

The funny thing about wedding planning is that you can't control the thoughts that enter your head and their timing. I'm about as far as you can get from being a morning person, but I have never seen so many early mornings since I got engaged. Who knew the sunrise cast such beautiful light on my tiny window sill?

I'm not saying I awake many a morning breaking out in a sweat; anxious and overwhelmed about all that needs to be done. Because that would imply that I have actually gotten some sleep (half joking). And while I don't normally greet the a.m. with wedding on the brain, every so often (like today) I do. And when I do (no pun intended), there is no going back to sleep. The thoughts must be addressed! 

This morning I awoke with ideas, fantasies (I'm a craft nerd), and half a dozen semi-solid plans for creating invitations for the wedding. It was bad enough that I stayed up until 2 a.m. last night sketching ideas and searching online for inspiration. But to awaken a mere 4 hours later after visions of card stock and ribbon, glue dots and stamps wouldn't allow me to settle down enough to sleep in? That hurt. And so, I left my deeply sleeping and snoring mutt (and lover!) and raced to the computer.

For what? 

Stamps! When I first started researching DIY invitations, it quickly became clear that one of the easiest, most elegant and simple ways to customize your invitations was to purchase or make a stamp that would serve as your theme or "brand," if you will. You can stamp your "Save the Dates," invites, napkin holders, favor cards, place cards, thank you cards, programs--whatever you include in your wedding can be stamped with the same, cute, simple, elegant design that you choose. Piece of cake! Except...you need to find a stamp, right? And this is where the search begins. Luckily, I can save you some time and tell you that all the millions of stamps on the stamping sites and stores get repetitive. I suppose this is not great news for those of you who don't find what you are looking for right away, but I assure you--there are so many beautiful choices that even a non-stamper (Jake) can find plenty of designs about which to get excited. In fact, a normally laid back Jake is now gung-ho about the stamp idea. (There was a bit of confusion for a few days when he thought I meant postage stamps, but it's presently all cleared up and he is undoubtedly enthused about the whole thing.)

Oh! Did I mention that stamping can be super cheap? All you need is:

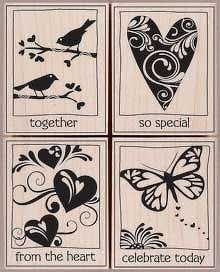
[Drumroll...] A stamp! These range anywhere from $2 to $30. But it is a one time cost and you're done!

 Ink pad. They average about $4 and one should last you well through all your wedding requirements and beyond. If you're going for broke and are indecisive, they even have 12 colors ink pad sets which can run about $60. 

  Paper. The cost of paper can add up, but it is surprisingly cheap if you do a bit of research and price comparison shopping (requires patience and time unfortunately). I plan to use card stock for my invites and have only done a limited search for the best quality and price , but will keep you posted. So far, I have not found it to be too expensive. A really nice quality, medium weight, semi-textured card stock like a white card stock with a linen finish will run you about $14 for 50 8.5 x 11 sheets. Not bad. Especially, as when Jake pointed out, even though we plan to have about 100 guests, many of them are couples/families and will only need one invitation. (Why I didn't figure that out on my own...I don't know, but thanks Jake!) Check Aylee's site for great resources for paper (among many other things!).

Next time you see one of those fancy shmancy invitations, love them, and think how expensive the paper must be, think again! It's likely that it is not the paper at all, but rather a series of really nice stamps that make the surface special.

Let me share with you some of the resources I have found useful and hopefully save you some time, if stamping is something in which you are interested. Keep in mind that these represent just the tip of the iceberg to get the juices flowing. There is so much more out there!


About stamping in general:
  • The mother-load of stamping techniques can be found here. If you thought stamping was about some dinky little boring black ink stamp, hold on to your seat, you'll be amazed!
  • Though there are many kinds, the most common types of stamps are either rubber stamps or acrylic/polymer (clear) stamps: Generally speaking, based on several reviews and artist statements, rubber stamps are best for stamps with a great deal of detail, while acrylic/polymer stamps are best for simpler designs. There are many pros and cons for each. The major difference is that clear stamps allow you to see through to your paper for exact placement, and can be much cheaper than traditional rubber stamps. However, clear stamps are not as resilient and do not last as long. For a complete description of the pros and cons (with sample images!) look here
Really cool stamps:

There are SO many sites for stamps (just google: rubber/clear stamp!) so here are just a handful that offer lovely choices and that I feel are reliable and have received great reviews.
  • Stampin' Up! offers really nice stamps for sale with a huge variety of designs from simple to very intricate. 
  • Remember the good old Joann Fabric stores? Well she's online now, and has lots and lots of nice craft items including stamps (hundreds). And I find her to be cheaper than many other places. I just ordered my first shipment from her--I'll share my purchases with you when I receive them! [P.S. Use this promotional code for free shipping: CCABINFEBF. Note that this expires March 15, 2009 but check here for more recent coupons.]
  • For fun, modern and not too expensive choices, try the Paper Source.  Even their "wedding" stamps are not too corny.
  • If you have a design in mind, or think it would be meaningful to co-design it with your wedding co-pilot, don't bother trying to find someone else's stamp--make your own. It's really not that hard. Like with most crafts, it just takes patience and little practice to perfection. Start with this tutorial. Or try this very simple instruction at DIY Weddings with very cute results!
DIY card tutorials & galleries for inspiration:
  • Splitcoaststampers--The place to go for stamping ideas, projects, tutorials, and forums. They showcase a new tutorial every Wednesday, archives of which can be found on the Resource Page. The projects can be super simple or get quite complicated. What I like to do is just look around their galleries for ideas. Remember not to overlook a project just because it isn't exactly what you want--you can take bits and pieces from each project and turn it into your own crafty design. Just take a little from each idea to get the creativity flowing. Another benefit? You won't see the word "wedding" too often, if at all, and yet they have SO many ideas that would be perfect for a wedding, like this adorable and relatively simple project that could work perfectly for wedding favors! It gets even better. Following every tutorial, readers submit their own versions of the project with their own additions and adjustments. I mean, could this be any more inspirationally awesome? Now you see why I can't sleep.
  • Here you can find a YouTube video describing some general stamping techniques. Sit back and let them do all the work while your imagination runs wild visualizing how cool your invites are going to look! You even get the sexy British accent as a bonus.
  • There are millions of sites that offer ideas for stamping specifically related to the Big W (the Wedding, not the ex-president, silly!). This will get you started thinking about it. This, that (look here especially for a nice breakdown of paper types and textures), here, and there, represent only the tip of the iceberg. She has really great ideas! Misolee also has great invitation/card ideas for a wedding, which include stamping ideas (keep scrolling down for more and more samples). While most of the stuff shown there is for purchase as opposed to a tutorial--who cares! Just use it to get ideas and make them yourself. You have all that you need inside that little head of yours, you just need a little creative nudge in the right direction!
Good luck, and don't forget to get some sleep!


Tuesday, February 3, 2009

Walk In Single...Hike Out Married!

Photo Credit: theogeo
Talk about a low-key, non-stress wedding!

Apparently, getting married at a beautiful location and having a simple ceremony has long been a no-brainer for many couples living near the Smoky Mountains of Tennessee. Who knew?

In Gatlinburg you can walk in as a twosome and walk out as a couple joined by matrimony in a snap. (Just don't get too frisky or risk a talking-to by Smokey Bear!) Why bother with Vegas when you can have the backdrop of the gorgeous grey-blue Smoky Mountains behind you, and toss your flower bouquet into the golden sunset yonder. Having been fortunate enough to have visited and hiked through the Smokies several times, the thought of exchanging vows with a crisp pine breeze wafting under my nose sounds absolutely delicious. From an article (no longer available online) I stumbled upon in yesterday's Chicago Tribune:

In Gatlinburg, there is no waiting period or mandatory blood test to get married. Just like Las Vegas, couples have flocked to the town of 4,900 to get married and stayed for their honeymoon.
Feeling impetuous? A wedding license is available for $38.50 (even on Saturday). Then, stroll into a wedding chapel, say the vows and you can be married in a matter of moments. According to the Gatlinburg Chamber of Commerce, 600,000 people come to the Great Smoky Mountains each year to get married or attend a wedding. The town is marketed proudly as "the wedding capital of the South."
"I've done it seven days a week," Taylor said. "We used to do 'marrythons' on Valentine's Day around the clock. We did as many as 60 in a 24-hour period." Taylor, an ordained Baptist minister known affectionately around town as the "Rev. Ed," has performed weddings for Billy Ray Cyrus (the father of "Hannah Montana" star Miley Cyrus) and country singer Patty Loveless. Taylor, 77, estimates he's performed about 85,000 marriages in Gatlinburg, where the majesty of the mountains is just a bouquet toss away.
Taylor was the first in Gatlinburg to make nuptials a business. Before he began presiding for the parades of excited couples, Taylor said tourists had to get married at a local farm supply store by a justice of the peace." They'd get there and climb over sacks of feed," he said. Taylor's ceremonies last 20 minutes and cost $150 on up. Taylor will be around a little longer (he has 12 scheduled weddings on Valentine's Day) while he sells his four chapels. He himself is single right now. How many times has he been married? "Too many." "I can tell them what not to do," he joked.
(Full article here.)

Maybe Jake and I will just "marrython" ourselves on down to the Great Blue Smokies and call it a day!

OK, well, at least that's Plan B.

Sunday, February 1, 2009

A Wild Mind Must Be Organized!


Photo Credit: Paul Worthington

Even before choosing the type of venue we wanted for our wedding, my mind was wild with ideas. Invitations and centerpieces; table settings and recipes; reception colors and ceremony vows. It was too much thinking for too little brain space. There were so many choices to be made. What's more, so many choices I never dreamed we would need to make (like, do you need the chair cushion and napkins to match? Ummm, no). Being a crafty-minded person, I quickly became understandably excited about all the things I could make for the wedding, and immediately started flipping through my "design it yourself" folder for ideas.

But, as usual, I was a bit ahead of myself. Which became embarrassing clear by Jake's reaction when I asked him what he thought of a rubber stamp I had been eyeing, explaining to him that we could use it for invitations and any other stampable wedding surfaces: "Huh? A stamp for what? What invitations? But...we don't even have a date yet...or a place...or a Rabbi...you haven't even told your sister!"

OK, so he had a point. First things first. But what to do about all the twirls of colors and patterns and late night craft sessions swirling around in that overactive Brain-O-Mine?

ORGANIZE!

It made sense. When the job became overwhleming, I organized my tasks. When the house got messy, I organized stuff. When planning a dinner party, I organized the menu. How was this any different? Yes, yes, yes! When the not-even-dated-located-discussed-or-fully recognized--wedding gets out of hand? Organize my thoughts! Unfortunately, this ever-so-obvious idea came much slower than it should have. In fact, it was weeks of the Swelling Head Phenomenon before I got it together.

It dawned on me as I was reading yet another not-so-helpful Wedding book from the library, which was more pragmatic than most. There it was in Chapter 10: "Getting Organized." Turns out this section had valuable advice about how to start collecting my thoughts in a civilized, manageable fashion. I almost dismissed the book entirely until I stumbled upon that chapter, which just proves that even if some books/magazines/articles/resources aren't helpful overall, they might just give you that one morsel of advice that makes it worthwhile. That's why I try to take at least one thing away from each resource and add it to my collection of ideas. (Incidentally, I apply a similar rule to people. It's amazing how favorably you can look upon your interaction with an otherwise miserable person if you try to find one thing about him/her that you like and add it to your repertoire of ideas. Even if the one thing is a hairstyle or a new vocabulary word, so be it. Aim low, you won't be disappointed). 

Though I also didn't love the author's exact recommendation, I simply adapted it to my my own needs, preferences, and style.

First, I was having trouble separating the "parts" of the wedding. For example, I was imagining all the different kinds of decorations I could make, without deciding whether they would be more appropriate for the ceremony or reception. This might not be a problem for some of you, but for me, it allowed my mind to run wild and undirected, as opposed to categorizing my ideas which is what would help me feel organized. So the first thing I did was grab a 3-ring binder, add plain paper and create tabs to distinguish the various parts of a wedding. Within each section, I included paper for notes, and a plastic sleeve I had sitting around from other projects, so that I could stick any pamphlets or business cards in it. I used sticky notes cut in half in different colors for the tabs, but you could use anything, even the fancy plastic ones if you want something more sturdy. A 3-ring hold puncher comes in handy too.

Once I had all the wedding parts divided, I realized that there were many things of which I knew little and would need to research more. For example, I wasn't aware of all of the traditional Jewish customs that comprise the wedding ceremony. This meant that I also wasn't sure which traditions I wanted to continue and which I felt were not right for me. I quickly jotted down that I needed to do more research on this topic in the future.

Other sections, as recommended by the book, reminded me to include things I had forgotten were even an issue. For instance, though I knew we would likely have out of town guests, I hadn't really considered their special needs (hotel, directions, maps) and didn't take into account that they would require time and possibly money (printing maps, for example). Dividing everything up in this way was super helpful in ways I hadn't expected.

Here are the different sections of my folder:
Untitled
Resources = books, articles, references, magazine pages, websites, etc. that might be useful. I also took notes on books I borrowed from the library (and thus had to return!) and whether they were helpful, as well as jotting down the main focus/angle of the book in case I would want to look something up later.

Budget
= list of running expenses & budget for certain items. Here I also included the items I got for free.

Calendar
= monthly list of things to do, including extra space for "2 weeks before the wedding," "1 week before the wedding," and "week of the wedding." Included here are little notes such whether we want guests to throw things (rice, seeds, flower petals) at us (probably not).

Ceremony
= list of traditions, supplies (in my case, materials to build a Chuppah, yarmulkes, etc.), ideas for vows, order of the ceremony, names of Rabbis to contact, things I need to research, details, etc.

Flowers
= ideas for bouquets (images from books/Internet printed out and placed in the plastic sleeve), centerpiece ideas, lists of stores, websites for flowers sources, nurseries, list of friends with gardens (no one in NYC!), list of people for whom I want to make corsages.

Clothing
= list of places to look for dresses (prom dresses work great!), style ideas, list of things needing to be discussed (ex/should Jake rent or buy a tux), list of friends and family who might lend me something to wear (veil, jewelry).

Reception
= list of supplies (tablecloths, napkins, silverware, vases), ideas for decorations with images from books/Internet printed and placed in plastic sleeves, ideas for drinks (lemonade, spiked punch), list of potential caterers, wedding cake ideas, and buffet table layout (if we choose to have one). Eventually, a seating chart will go in this section.

Music
= list of pros and cons for a band vs. DJ, list of songs we love in case we go the DJ route, list of musical friends to ask for recommendations, ideas for where to look for bands (myspace pages, music store fliers, etc).

Invitations
= tons and tons of images printed/copied from books and placed in the plastic sleeve, random ideas and inspirations, list of local paper/stationary stores, list of things to try to get free on freecycle, thoughts for Save the Date cards (ex/postcard vs. card), rubber stamp designs, scraps of pretty paper I have in case I want to use them.

Guests/Gifts
= keeping track of the gifts next to the guests will save a lot of time later. I printed out charts with the following column headings for easy tracking:
  • NAME & ADDRESS:
  • SAVE THE DATE MAILED: (enter date mailed)
  • INVITATION MAILED: (enter date mailed)
  • RSVP: (will enter when received and how many guests attending per group)
  • GIFT DESCRIPTION:
  • THANK YOU CARD MAILED: (enter date mailed).
This made things really easy to track, and now I have a specific place to add addresses of guests as they trickle in from family. Here I also included emails/information from our family members containing details about certain people (Ex/don't forget Grandma will need room for her wheelchair), other special needs (names of people we still need to decide whether to invite or not).

Photography
= specific resources for finding a good photographer (friends' names who know or are photographers, websites for how to choose a photographer and good questions to ask, yellow page listings/numbers). In this section I will also add a list of people/things that I want the photographer to shoot (I didn't think of this, but the book brought it to my attention which was good).

Incidentals
= here I included random things that didn't fit elsewhere, like: getting a marriage license, costs/food for events surrounding the wedding that are not the wedding itself (dinners, lunches, meetings with family, etc).

Delegation
= I am really bad at delegating. Blame the inner (and outer) control freak in me. So I included this special section to force me to delegate. Here I included tasks matched with possible people to be in charge of each task. For example, someone to: announce the dances (father-bride dance, couple's dance), to refill/refresh the food buffet, to refill refreshments, to help with the wedding set up, and to light candles and check that they remain lit. I am not even sure I will incorporate all these things into the wedding but I just jotted them down to remind me to decide later.

Out of Towners = some thoughts on special tasks regarding out of town guests. For instance, providing modest welcome gifts in the hotel rooms, directions from the airport, fun things to do in the area, etc. Again, I'm not sure I will need all these things, but I included them mostly to remind myself to decide at a later date.

The book suggested having fun decorating your folder--both for inspiration and because it is something you will likely consult frequently--why not make it pretty? I also had fun creating fun headings for each sections, to keep things light and creative. For example I titled my calendar, " list of easy things to do for a SMASHING wedding!" I included snapshots of my folder below. I used stickers (any excuse to use stickers...) for the cover and will cut out faces of Jake and I to stick in there from old photos. Jake already covets the folder and thinks it's so cute!

Now that I have the folder at hand, I jot down any thoughts or questions Jake or I have in the corresponding sections. It really helps me to feel organized and in control of the many various parts of the wedding and preparations that can often lead one to feel overwhelmed. 

If I could only organize all the other parts of my life this well...

Happy planning!